
A fossil goes through three very different jobs before it becomes data: finding it, getting it out of the rock, and figuring out what it is. Each stage has its own instruments, and they range from a 150-year-old rock hammer design to a CT scanner that costs more than a house. This guide follows that order, so you can see why each tool exists.
Contents
- Quick reference table
- Stage 1: Field instruments
- Stage 2: Preparation instruments
- Stage 3: Analysis instruments
- What hobbyists can use
- Summary
Quick reference table
| Tool | Stage | Purpose |
|---|---|---|
| Rock hammer | Field | Split rock and expose fossil-bearing layers |
| Chisels and picks | Field | Remove rock close to the bone |
| Brushes | Field | Clear loose dirt without scratching the surface |
| Brunton compass | Field | Measure the tilt and direction of rock layers |
| GPS unit and drone | Field | Record exact positions and map the site |
| Plaster jacket | Field | Protect a fragile specimen for transport |
| Air scribe | Lab | Chip matrix away with a tiny vibrating needle |
| Air abrasive unit | Lab | Blast away fine matrix with powder |
| Dental picks | Lab | Hand-clean delicate surfaces |
| Acid bath | Lab | Dissolve limestone around phosphatic fossils |
| Consolidant | Lab | Glue and stabilize crumbling bone |
| Stereo microscope | Lab/analysis | Magnify fine detail during cleaning and study |
| Petrographic microscope | Analysis | Examine thin slices of bone and rock |
| CT scanner | Analysis | See inside a fossil without cutting it |
| SEM | Analysis | Image surfaces at microscopic scale |
| Photogrammetry rig | Analysis | Build a 3D digital model from photos |
| Mass spectrometer | Analysis | Measure isotopes for diet, climate, and age |
Stage 1: Field instruments
Rock hammer and chisels
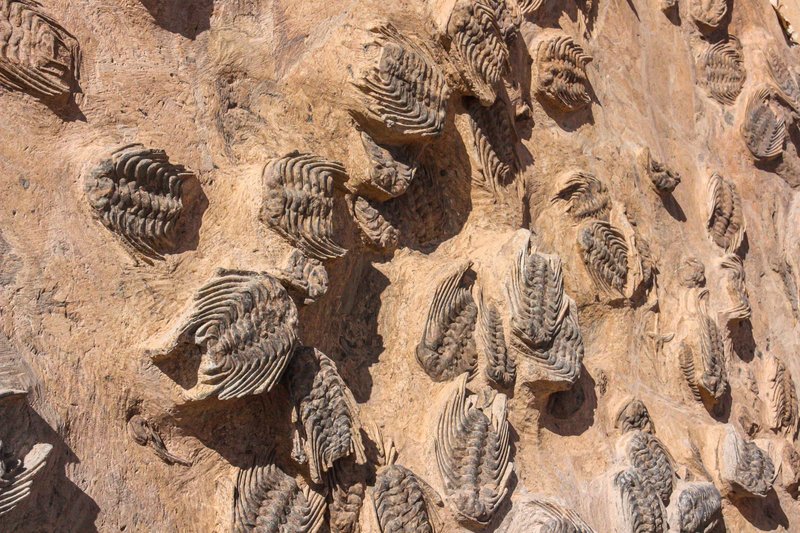
The classic geologist’s hammer has a flat head on one side and a pick or chisel tip on the other. The flat end splits layered rock along its bedding planes. The pointed end pries it apart. Paleontologists pair it with cold chisels of different widths, so the tool can match the job: a broad chisel for removing overburden, a narrow one for working within a few centimeters of a bone.
The rule in the field is to stop hammering as soon as you see bone. From there, work shifts to awls, dental tools, and brushes.
Brushes and awls
A soft paintbrush sweeps away loose sediment so you can see where a bone ends and the rock begins. Stiffer brushes handle sandstone grit. Awls and old dental picks loosen matrix grain by grain. Slow work, but a dinosaur rib is easier to replace in your imagination than in a drawer.
Brunton compass, GPS, and drones
A Brunton compass measures strike and dip, meaning the direction and angle at which rock layers tilt. That matters because the layer a fossil comes from tells you its age. Without it, a skeleton is just a rock with an opinion.
GPS units log the exact coordinates of every find. Drones now photograph whole quarries from above, producing maps that show where bones cluster. Those maps help a crew decide where to dig next and keep a record of the site if erosion destroys it.
Plaster jackets
A large bone can’t be lifted bare. Crews dig a trench around it, leaving a pedestal of rock underneath. They wrap the exposed surface in wet paper or foil, then layer on plaster-soaked burlap strips, often reinforced with wooden poles. Once the plaster hardens, they flip the block and jacket the underside. The same technique is used for dinosaur bones and has been since the late 1800s. A Smithsonian National Museum of Natural History specimen can arrive in the lab inside a plaster block that weighs hundreds of kilograms, opened only after it is on a prep table.
Sieves and screens for microfossils
Not every site involves a skeleton. Microfossil hunters, who look for teeth, scales, and tiny bones, collect bulk sediment and wash it through nested sieves with different mesh sizes. What stays on the mesh is dried and picked over under a microscope. A single bucket of sediment from a Cretaceous stream deposit can hold dozens of shark and mammal teeth smaller than a grain of rice.
Stage 2: Preparation instruments
Back at the lab, a preparator spends weeks or months removing the rock, called matrix, from a specimen. The tools get smaller and gentler.
Air scribe
An air scribe works like a miniature jackhammer. Compressed air drives a carbide needle back and forth thousands of times a minute, chipping away rock in tiny flakes. The user controls the force with a foot pedal or a dial, which is why a skilled preparator can clean the surface of a bone without marking it. Many university labs, such as the Cortland paleontology lab, list air scribes alongside microscopes as core equipment.
Air abrasive unit
Think of a sandblaster for a thumbnail-sized area. It fires a fine stream of powder, such as sodium bicarbonate or dolomite, to wear away soft matrix. It works best on small, tough specimens and gives a clean finish where a needle would leave marks.
Dental picks and needles
Dentists retire their picks and preparators inherit them. Hand tools remain the final word when a bone is too delicate for any machine, like a fish skull or an insect in amber-bearing rock.
Acid baths
For some fossils, the fastest route is chemistry. Phosphatic fossils, like many teeth and bones, survive weak acids, while the limestone around them does not. Preparators soak the block in dilute acetic or formic acid, rinse it, and repeat. The process frees whole conodont teeth and small vertebrate bones that no hand tool could extract intact.
Consolidants and adhesives
Old bone is often brittle and chalky. Preparators soak it in a consolidant, a dilute solution of a stable polymer such as Paraloid B-72, which seeps into cracks and hardens. Cracked pieces are glued together with the same family of materials, chosen because they can be dissolved later if a repair needs to be undone.
Stereo microscope
A stereo microscope, with two eyepieces and a long working distance, sits over most prep tables. It gives a three-dimensional view that lets a preparator see exactly where a needle tip is touching bone.
Stage 3: Analysis instruments
Once a fossil is clean, the questions change. Researchers want to know what’s inside it, how it grew, what it ate, and how old it is.
Petrographic microscope
A petrographic microscope uses polarized light to study thin sections, slices of rock or bone ground to about 30 micrometers. In a dinosaur bone, the slice reveals growth rings, much like tree rings, which let researchers estimate how fast the animal grew and how old it was when it died.
CT scanning fossils
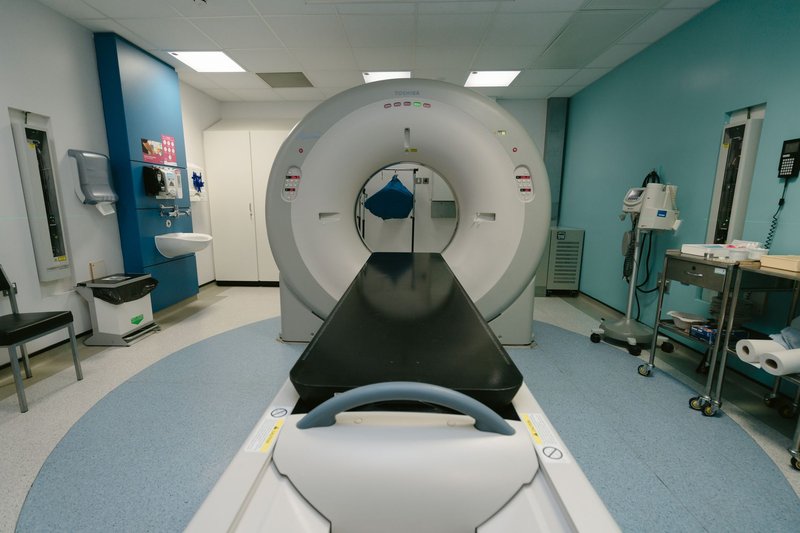
Computed tomography uses X-rays from many angles to build a 3D model of a specimen’s inside. Researchers use it to see skull cavities, inner ear structures, and brain shape without cutting anything open. A skull still locked in rock can be digitally “prepared” on a screen, which is how scientists study specimens too fragile or too valuable to clean by hand. The American Museum of Natural History and other major collections now scan specimens routinely.
Scanning electron microscope
An SEM images surfaces at magnifications far beyond any optical microscope. In paleontology it reveals things like the microscopic structure of feathers, the pits on a tooth made by chewing, and the shell structure of microfossils. Some SEM studies of fossil feathers have identified melanosomes, the pigment-bearing structures that hint at original color.
Photogrammetry
Photogrammetry stitches hundreds of overlapping photographs into a 3D model, using nothing more than a camera and software. It is the low-cost cousin of laser scanning. Trackways, which can’t be moved, are routinely documented this way, and the resulting models can be shared online or 3D printed.
Isotopic analysis
A mass spectrometer measures the ratios of isotopes in fossil teeth, shells, or bone. Oxygen isotopes help reconstruct past temperatures. Carbon isotopes indicate diet. Radiometric dating, measuring the decay of unstable isotopes in volcanic ash layers above and below a fossil, gives the actual numbers for age, which is how a layer gets a date of, say, 66 million years ago.
What hobbyists can use
You don’t need a lab to start. A basic kit costs less than a nice dinner, and this overview of eight essential paleontology tools explains what each piece does:
- A rock hammer and a few chisels
- Safety glasses and gloves (rock chips fly)
- Soft brushes and a set of dental picks
- A hand lens (10x) for close inspection
- Newspaper, foil, and plastic bags for wrapping finds
- A notebook and phone camera to record where each find came from
Hobbyists with more ambition can add an inexpensive air scribe and a small compressor, then practice on common invertebrate fossils such as brachiopods or trilobites. Sieving creek gravel for shark teeth is another beginner-friendly microfossil method.
One caution: collecting rules vary. In the United States, vertebrate fossils on federal land generally need a permit, and the National Park Service prohibits collecting in parks. Check the land status before you dig.
Summary
The instruments used in paleontology follow a simple logic. Field tools find and extract the fossil without breaking it. Preparation tools reveal it. Analysis tools turn it into knowledge about growth, diet, climate, and age. The hammer is old and the CT scanner is new, but each solves the same problem: getting information out of rock without destroying it.