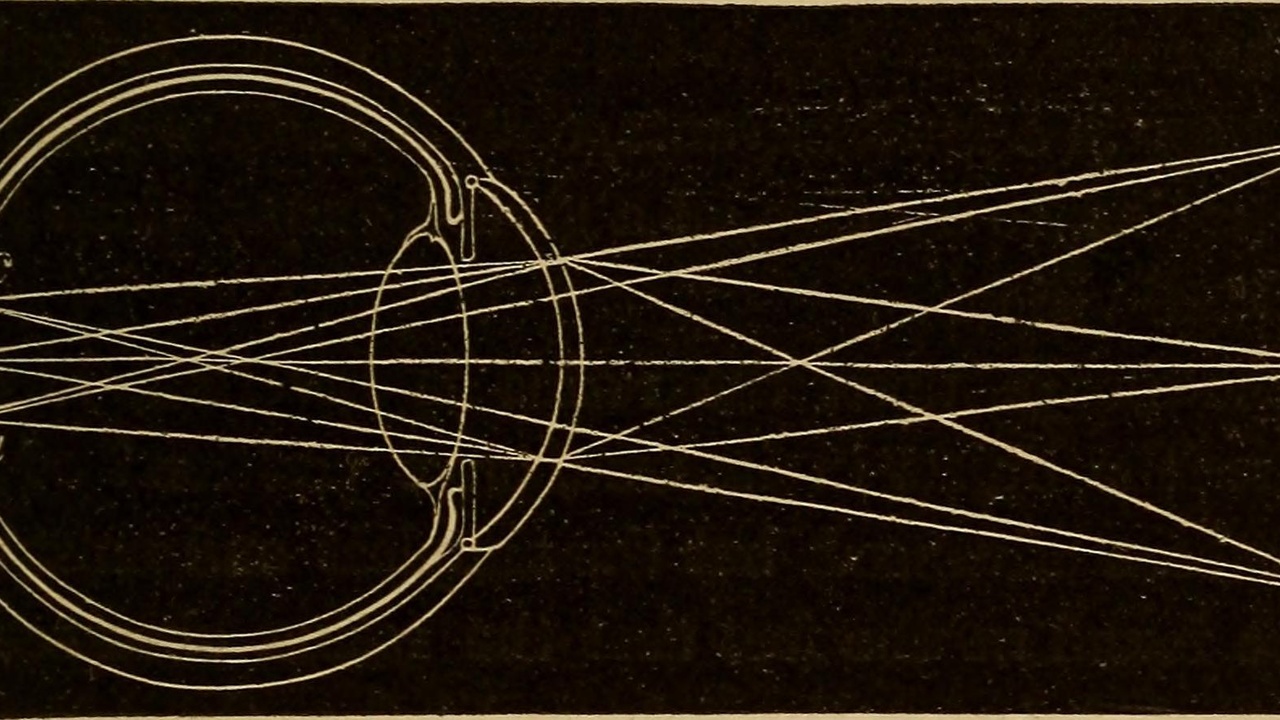
Eyeglasses first appeared in northern Italy in the late 13th century (c. 1286), and they relied entirely on simple glass lenses to correct vision—long before anyone fully understood focal length or image formation.
Fast forward to now: the choice between convex and concave optics matters for everything from a pair of reading glasses to a camera lens. Pick the wrong element and an image will be fuzzy, flipped, too small, or impossible to project.
A convex lens is thicker at the center and tends to bring light rays together. A concave lens is thicker at the edges and makes rays spread out.
Understanding the seven key differences below makes it easier to predict how each lens bends light, what kinds of images they form, and which jobs they suit best.
Quick fact: optical power is measured in diopters, where 1 diopter = 1 m−1. That gives a handy rule of thumb when you compare prescription numbers to focal lengths.
What follows are seven clear, practical contrasts, each with a short explanation of the physics and a concrete example you can picture or touch.
Physical shape and basic optical behavior
1. Curvature and thickness: convex is thicker at the center; concave is thicker at the edges
Convex lenses bulge outward. They are thicker in the middle than at the rim. Common forms include biconvex and plano-convex shapes.
Concave lenses curve inward and are thicker at the edges. Examples are biconcave and plano-concave elements used when you need negative optical power.
Qualitatively, tighter curvature means stronger bending and shorter focal length. Lensmakers use that geometry to set optical power without diving into complex formulas.
Concrete example: a +2.00 D reading lens has f = 0.5 m and is noticeably thicker at the center than a −2.00 D lens, which looks thinner in the middle and heavier at the edges.
Where it matters: spectacle shops, portable magnifiers, and camera element mounts all take physical thickness into account for fit and weight.
2. Light path: convex lenses converge light; concave lenses diverge light
Put simply, convex lenses bring parallel rays toward the optical axis so they meet at a focal point on the far side.
Concave lenses bend parallel rays outward. The rays appear to come from a virtual focal point on the incoming side rather than meeting in front of a screen.
Numerical compare: a plano-convex element of f = 100 mm is +10 D, while a plano-concave of equivalent magnitude would be −10 D and spread rays instead of focusing them.
Practical implication: converging lenses form real images you can capture on film or a sensor. Diverging lenses alone cannot form a real image of a distant object; they only produce virtual images the eye perceives.
Examples: projector and microscope objectives use positive, converging elements. Myopia-correcting spectacles use negative, diverging lenses.
3. Focal point and focal length sign: convex focal lengths are positive; concave are negative
Optical convention labels convex lenses with positive focal lengths and concave lenses with negative ones. That sign tells you where the focal point sits relative to incoming light.
Physically, a positive focal length means light actually converges on the opposite side of the lens. A negative focal length means the focal point is virtual and lies on the same side as the source.
Diopter examples: +4 D implies f = 0.25 m. A −1.5 D lens gives f ≈ −0.667 m. Those signs matter when combining elements in a system.
Optical designers routinely add a negative element to a positive group to tune net power and shift principal planes; think of combining a +40 mm element with a −20 mm element to reduce overall focal length and correct aberrations.
Image formation and magnification behavior
4. Image types and positions: convex lenses can produce real or virtual images; concave lenses produce only virtual images
Convex lenses are flexible: place an object beyond f and you get a real, inverted image on the far side. Move the object inside f and the lens yields a virtual, upright, magnified image.
There’s a handy rule: objects at 2f produce images at 2f with the same size but inverted. That 2f rule shows why camera objectives and projection lenses are usually positive elements.
Concave lenses never produce a real image of a real object. They always give a virtual, upright, reduced image located between the lens and the object.
Examples: a +100 mm objective can project a sharply focused picture onto a sensor. A single concave element might be used in a peephole or as a corrective element, but not as the sole projector.
5. Magnification behavior: convex lenses can magnify; concave lenses reduce apparent size
Convex lenses are the basis of magnifiers: when you hold an object closer than the focal length, the lens produces an enlarged virtual image your eye can examine.
Concave lenses do the opposite. They create smaller virtual images and are therefore not standalone magnifiers.
Numeric example: a handheld loupe of about +10 D (f = 0.1 m) gives noticeable enlargement for fine work like watchmaking or jewelry inspection.
Practical note: convex lenses form the core of microscopes and loupes. Concave elements are used in eyepiece groups and wide-angle camera designs to reduce the image and control field size.
Applications, prescriptions, and optical design implications
6. Common applications: convex in microscopes and reading glasses; concave in myopia correction and wide-angle designs
In everyday life, convex lenses appear in reading glasses for hyperopia, magnifying glasses, camera objectives, and microscope condensers.
Concave lenses show up in eyeglasses for myopia, beam expanders, some peephole designs, and as negative elements inside wide-angle camera assemblies.
Prescription examples make this concrete: −2.00 D is a common myopia correction and uses negative lenses. Mild hyperopia might be corrected with +1.75 D positive lenses.
Product examples: Zeiss and Ray-Ban manufacture spectacle lenses across these powers. Camera makers such as Canon and Nikon mix positive and negative elements inside complex zooms and primes to achieve specified focal lengths and compact sizes.
7. Design and aberration control: convex and concave elements are combined to correct chromatic and spherical aberrations
No single lens is free of flaws. Spherical surfaces introduce spherical aberration; dispersion causes chromatic aberration (color fringing).
Inventor John Dollond patented an achromatic lens in 1758 by pairing a positive crown-glass element with a negative flint-glass element to reduce color fringing. That trick still underpins achromatic doublets today.
Modern camera and telescope objectives use groups of convex and concave elements to correct multiple aberrations while keeping lenses compact and light. Coatings, aspherical surfaces, and glass selection are part of the same toolbox.
Practical advice: when choosing optics, look beyond a single curved surface. Ask whether the design includes compensating elements, as that determines real-world performance more than center thickness alone.
Summary
- Physical shape sets behavior: convex bulges at the center and converges light; concave curves inward and diverges light.
- Convex lenses have positive focal lengths and can form real, inverted images or magnified virtual images; concave lenses have negative focal lengths and only form virtual, upright, reduced images.
- For everyday choices: use convex elements for magnification and projection; use concave elements for myopia correction and to reduce or spread an image in optical assemblies.
- Designers typically combine positive and negative elements (achromatic doublets, multi-element lenses) to control chromatic and spherical aberrations rather than relying on one lens alone.
If you want to check your own lenses, compare prescription numbers (remember 1 D = 1 m−1) and note whether numbers are positive or negative, or consult an optometrist for precise fitting and recommendations.